How to Make a Poster with Neon Words
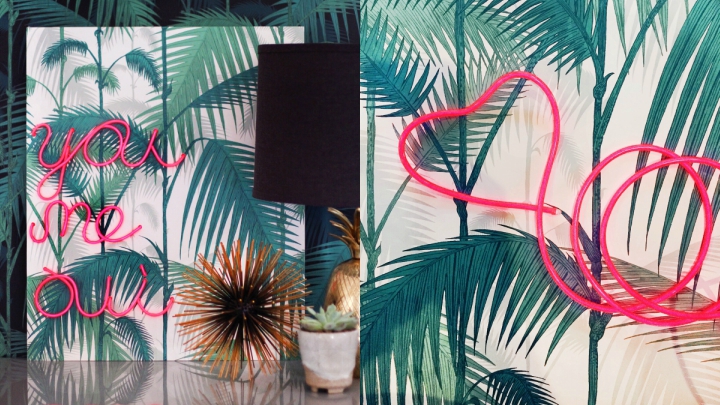
Today we’ll show you how you can create a bright neon sign where you can write the word you want, because you’ll make it fully customized. It is about designing that text with your own typography and choosing the backdrop on which you want it to be written. Let’s see the proposal blog Honestly WTF, but I invite you, on this basis, make your own fully adapted to your home decor.
The two main elements of this neon sign are the wire Electroluminescent neon and flexible sheet on which you’ll place. You can use a yarn of the size, length and color you like, and you need to be at least 6 millimeters thick. Here they have used a tropical print of the most fun but, as I say, you can use the one that you like the most.
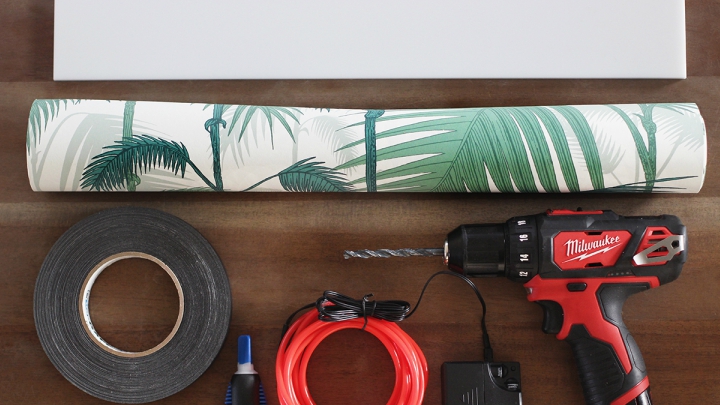
The materials you will need
- A white acrylic sheet. In this DIY the measures used are 50 × 60 centimeters.
- The cable neon color you want and the length you need to write your word.
- Glue (here was used Loctite Super Glue Gel Ultra Control)
- A drill.
- Pencil and rubber.
- Rule.
- Scotch tape.
- A 9v battery.
- A printed sheet (optional).
- A glue for decoupage, for example, and a foam brush (optional).
How to Build Your Neon Sign, Step by Step
The first thing to decide is whether going to write directly on the white acrylic or put one patterned paper as background. If you decide to do it with the paper (it is much more beautiful and decorative, do not you think?) Simply cut the paper according to the size of the acrylic sheet. Extend a thin layer of white glue over the acrylic and glue the stamped sheet. Help yourself to the rule to get rid of any air bubbles. Leave to dry for at least one hour, or as directed by the manufacturer.
How to write the text
Once the pattern is glued to acrícilico, written with pencil the word you want to design with neon light to see the size and position. When you like how you put it, mark where the holes will go. Each time the pencil is lifted or the lines are doubled, you will have to make a hole to pull out the cable and return to another point. For example, in this particular case, the letter “m” will have a hole at the beginning, then another hole will be drilled at the end of the first curve so that the cable can exit and return to the beginning of the second. This will prevent the wire in the front of the acrylic from being duplicated.
You may also like to read another article on BixiDeco: DIY Geometric Shelves
The holes
Pierce marks to make holes. Glue the end of the cable to the back of the acrylic, without the battery pack. Pass the thread through the first hole in the first letter, and begins to form the word or words that you write, following the previously marked with pencil stroke. Watch the cable every two centimeters, and so that it does not take off while you do it and do not move the letters you can help you from a body tape or another that does not damage the paper to hold the neon wire.

The termination
Once you have finished writing your word let the glue dry thoroughly. Then remove the tape, taking care not to tear the paper, connect the battery and hold it well. Then I leave you with images Honestly WTF in which you will be able to see the whole creative process to make this neon sign for your home.