Headboard colors with geometric pieces
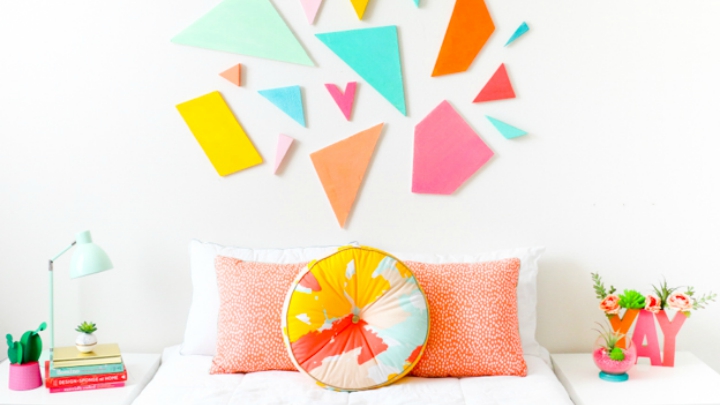
If you want to add a touch of color and fun to the headboard of your bed the craft that we bring you today is more than appropriate. And it is that you can design a personalized and colorful geometric headboard with which to get him a new air to the room. You’ll see just how easily you’ll be able to achieve. Do you dare to try? In today’s post we tell you all the steps you need to follow to decorate your bedroom in a very special way.
Geometric forms
In this DIY geometric shapes are the protagonists. And you’ll be able to design as you like best, since you have complete freedom to choose their size, design and color with which you paint. But let’s go into detail to start preparing this cheerful and colorful headboard. Technically, it is not a headboard, but as it is on the bed we have named. If you fancy, you’ll be able to place in another location, but we loved this proposal we have seen in the blog A Kailo Chic Life.

The materials
Thus, for this project we need:
– Foam sheets of different thicknesses. The contrasts at craft stores.
– A utility knife to cut the sheets.
– A special paint to give a smooth finish to the foam and to be able to paint more comfortably.
– Rule
– Fine grit sandpaper.
– Spatula.
– Acrylic craft paint.
– Double – sided tape.
– Brushes.
Creating this geometric headboard step
The first step is to cut the foam sheets creating several geometric pieces with different sizes and shapes. With the rule you can help to make the straight edge and will serve as a guide for cutting the sheets. As you can see in the pictures, you can make any shape you can think of: triangles, arrows, circles, trapezoids, diamonds … It is that you create a fully customized composition, will be a unique design. This will serve as a guide and inspiration but surely, you’re already imagining your own headboard.
You may also like to read another article on BixiDeco: How to decorate leaving wires in sight
The coating
When you have the cut pieces, use the product coating for smooth finish. This material seals the foam, smoothes and allows more easily paint the pieces. If you cannot find it can use modeling putty, aguaplast or paper mache. Using a spatula, you can distribute the product on the foam well. Creates a smooth, thin layer and let sit overnight to harden or follow the manufacturer if advises another time or methodology. When it has dried, smoothes irregularities with the sandpaper and sharpens the edges.

The painting
It’s time to color your pieces. Once again, free to choose colors. Everything depends on your taste and style have stay or you want to give. Here they have opted for vivid hues, they are great and give great joy to the bedroom. As I say, you can choose which you prefer. When dry, you can paste on the wall using a double – sided tape.
The images of this craft
Then I leave you with some pictures of this simple and effective craft at the same time. Like I said at the beginning, if you do not find the material to coat the foam before painting can use other techniques to smooth the material and color better grip and remains more uniform. The rest, you know, imagination and personalization to the maximum to the choice of colors and forms employed. Even for the location. To me what I like a lot but can you think of any other place where I could put this craft?