How to Follow a Paint Brush Buying Guide for Perfect Results
Picking the right paint brush seems simple. However, the wrong choice can ruin an otherwise perfect project. Whether you are decorating a room, working on a canvas, or refinishing furniture, the brush in your hand makes all the difference. A good painting guide will always start here, with the brush.
Many beginners skip this step. They grab whatever is available and wonder why their results look rough or uneven. The truth is that every type of paint, surface, and technique calls for a specific kind of brush. Therefore, understanding how to choose one is a skill worth developing early.
This article will walk you through everything you need to know. From brush materials to shapes and sizes, you will find practical guidance that leads to cleaner, more professional results every time.
Why the Right Brush Changes Everything
A brush is not just a tool for spreading paint. It controls how the paint flows, how smooth the finish looks, and how much effort you put into each stroke. A poor-quality brush leaves streaks, sheds bristles, and absorbs too much paint. A good one glides smoothly and holds its shape stroke after stroke.
Additionally, the right brush saves you time. When paint applies evenly on the first pass, you spend less time going back to fix mistakes. That means fewer coats, less paint wasted, and a cleaner final result.
Therefore, spending a little time on brush selection tips before you start your project is always a worthwhile investment. It pays off in the quality of your work and the enjoyment of the process.
Understanding Brush Bristle Types
Brushes come in two main bristle categories: natural and synthetic. Each serves a different purpose. Understanding the difference is the first step toward making the right choice.
Natural Bristle Brushes
Natural bristles come from animal hair, most commonly hog or ox. These brushes work best with oil-based paints, varnishes, and stains. They hold a large amount of paint and release it smoothly and evenly.
However, natural bristle brushes should never be used with water-based or latex paints. The bristles absorb water and become soft and limp. This causes them to lose their shape and perform poorly. Therefore, always check your paint type before reaching for a natural brush.
Synthetic Bristle Brushes
Synthetic brushes are made from nylon, polyester, or a blend of both. These are the most versatile option available today. They work well with water-based, latex, and acrylic paints. Additionally, they hold their shape better than natural bristles when exposed to moisture.
For most home painting projects, a good synthetic brush is the safest and most reliable choice. They are also easier to clean and tend to last longer with proper care.
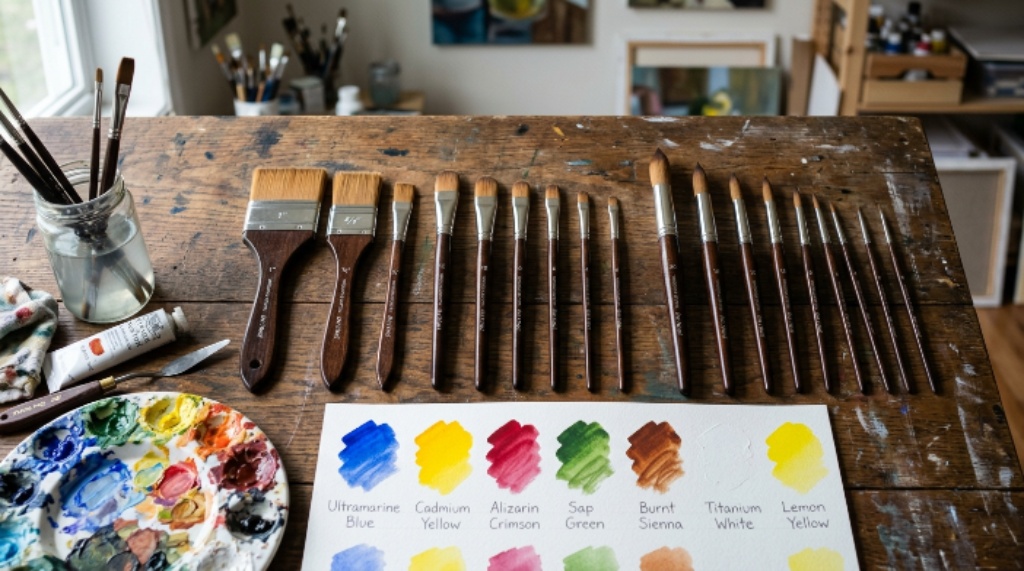
Choosing the Right Brush Shape
Brush shape affects how you apply paint and what kind of finish you achieve. Different shapes are designed for different tasks. Knowing which one to use will dramatically improve your results.
Flat Brushes
Flat brushes have a square tip and a wide, even surface. They are ideal for applying paint over large, flat areas. Additionally, they work well for bold strokes and for blending colors on canvas. However, they can be harder to control in tight corners or along detailed edges.
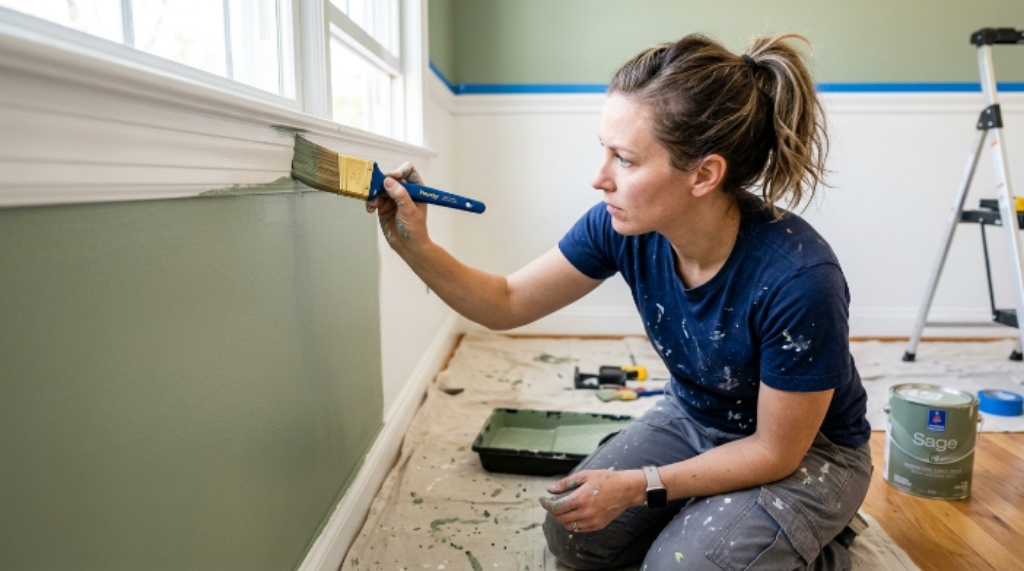
Angled or Sash Brushes
Angled brushes have bristles cut at a slant. This design gives you better control around corners, trim, and edges. Therefore, they are a top choice for cutting in along walls, baseboards, and window frames. Many professional painters keep an angled brush as their primary tool.
Round Brushes
Round brushes taper to a point. They offer the finest level of control and are most common in artistic painting. However, they also work well for detailed trim work, touch-ups, and small decorative projects. They hold less paint than flat brushes but allow for more precise application.
Chip Brushes
Chip brushes are inexpensive, rough-bristled brushes used for applying adhesives, stains, and primers. They are not designed for fine finishes. However, they are incredibly useful for prep work and tasks where precision does not matter as much.
Picking the Right Brush Size
Brush size is measured in inches across the width of the bristles. Common sizes range from one inch to four inches for wall painting. Smaller sizes are used for detail work and trim.
As a general rule, use a larger brush for larger areas and a smaller brush for fine detail. A two-inch angled brush is one of the most versatile sizes for home painting. It handles both cutting in and small surface coverage well.
Additionally, using a brush that is too large for a task makes it harder to control. It can result in drips, overlaps, and uneven coverage. Therefore, match the brush size to the scale of the work, not just the surface area.
Matching Your Brush to the Paint Type
This is one of the most important brush selection tips you will find in any painting guide. Every paint formula has a different consistency and drying speed. Using the wrong brush causes problems with application and finish.
For latex and acrylic paints, choose a synthetic brush. These paints dry quickly, and synthetic bristles handle the moisture without losing their shape. They also clean up easily with water.
For oil-based paints, alkyd paints, and varnishes, choose a natural bristle brush or a high-quality synthetic designed for oils. Oil-based products dry slowly, so the brush needs to hold paint without dripping and release it smoothly during application.
For chalk paint or mineral paint, a brush with soft, thick bristles works best. These paints are thick and require a brush that can hold and spread a heavier load without streaking.
Evaluating Brush Quality Before You Buy
Not all brushes are made equally, even within the same category. Here are the key things to check before purchasing:
- Fan out the bristles and look for flagged tips. Flagged tips are split ends on the bristles that help paint flow more smoothly onto the surface.
- Pull gently on the bristles. A quality brush will not shed. Loose bristles end up in your paint and on your surface.
- Check the ferrule. This is the metal band that connects the bristles to the handle. It should be firmly attached with no wobble.
- Feel the handle. It should feel balanced and comfortable in your hand. Painting is a repetitive motion, so grip comfort matters more than it seems.
- Look at the belly of the brush. A fuller belly holds more paint and releases it more evenly. Thin, sparse bristles are a sign of lower quality.
How to Care for Your Brushes
A quality brush is an investment. Therefore, proper care extends its life significantly and keeps it performing like new.
Always clean your brush immediately after use. For water-based paints, rinse with warm water and mild soap. Work the soap into the bristles with your fingers and rinse until the water runs clear.
For oil-based paints, use mineral spirits or paint thinner. Swirl the brush in the solvent, wipe it clean, then wash with soap and water. Repeat until no color remains in the bristles.
After cleaning, reshape the bristles gently and lay the brush flat or hang it bristle-down to dry. Never stand a wet brush on its bristles. This bends them out of shape and ruins the brush over time.
Additionally, store clean brushes in their original sleeves or in a brush holder. This protects the bristle shape during storage.
Common Mistakes to Avoid
Even experienced painters make avoidable mistakes when it comes to brushes. Knowing these pitfalls ahead of time will save you frustration.
Using one brush for everything is a common error. Different projects need different tools. A brush that works well for walls will not give you clean results on trim or detailed woodwork.
Skipping brush preparation is another mistake. Before using a new brush, flick it through the air to remove any loose bristles. Additionally, for water-based paints, lightly wet the bristles with water first. This primes the brush and improves paint flow.
Overloading the brush with paint leads to drips and uneven coverage. Dip only the first third of the bristles into the paint. Tap gently on the inside of the container to remove excess. Never drag the brush across the rim, as this removes too much paint and damages the bristles.
Finally, letting paint dry inside the bristles ruins brushes permanently. Always clean your brush before the paint has a chance to harden inside.
Conclusion
Choosing the right paint brush is not complicated, but it does require a little knowledge and attention. The brush you choose affects every aspect of your painting project, from how easily the paint applies to how clean the finished surface looks.
Start by identifying your paint type and choosing bristles to match. Then select the right shape and size for the task at hand. Evaluate quality by checking the bristles, ferrule, and handle before buying. Take good care of your brushes after each use, and they will reward you with consistent, professional results for years.
Whether you are following a detailed painting guide or working from experience, the fundamentals remain the same. The right brush, used correctly and maintained well, makes every project more enjoyable and every result more impressive.
Frequently Asked Questions
1. What is the best type of brush for beginners?
A two-inch angled synthetic brush is the best starting point for most beginners. It is versatile enough to handle walls, trim, and edges. Additionally, synthetic bristles work with the most common paint types, including latex and acrylic. Therefore, it covers the widest range of everyday painting tasks.
2. Can I use the same brush for different types of paint?
You can, but it is not recommended without thorough cleaning in between. Mixing paint types on the same brush, especially oil and water-based paints, causes performance problems. If you clean the brush completely between uses, a synthetic brush can handle multiple paint types over its lifetime.
3. How do I stop my brush from leaving streaks?
Streaks usually happen for three reasons: too much paint on the brush, using the wrong brush for the paint type, or a low-quality brush shedding bristles. Start by loading less paint onto the bristles and using long, smooth strokes. Additionally, make sure your brush matches the paint formula you are using.
4. How many brushes do I need for a standard room painting project?
For painting a standard room, two or three brushes are usually sufficient. Use a larger flat or angled brush for the walls, a smaller two-inch angled brush for cutting in at edges and corners, and a one-inch brush for fine trim work and detail areas. Having dedicated brushes for each task gives you better control and cleaner results.
5. Is it worth spending more money on a premium brush?
Yes, in most cases. A mid-range to premium brush applies paint more evenly, sheds fewer bristles, and lasts much longer than a cheap one. Over time, a quality brush saves you money because you replace it far less often. However, you do not need the most expensive option on the shelf. A well-made brush in the mid-price range delivers excellent performance for home and hobby painting projects.
Related Topics:
How to Hide Wall Imperfections With Paint, Stickers and Wallpapers
How to Make Paint Dry Fast? Step by Step Easy Method