How to Build a Hip Roof: Crafting Your Shelter with Style
Building a hip roof is like creating the crown for your home – it not only provides protection but adds a touch of elegance. In this guide, we’ll delve into the intricacies of constructing a hip roof, breaking down each step to empower you with the knowledge needed for a successful project.
Understanding the Basics
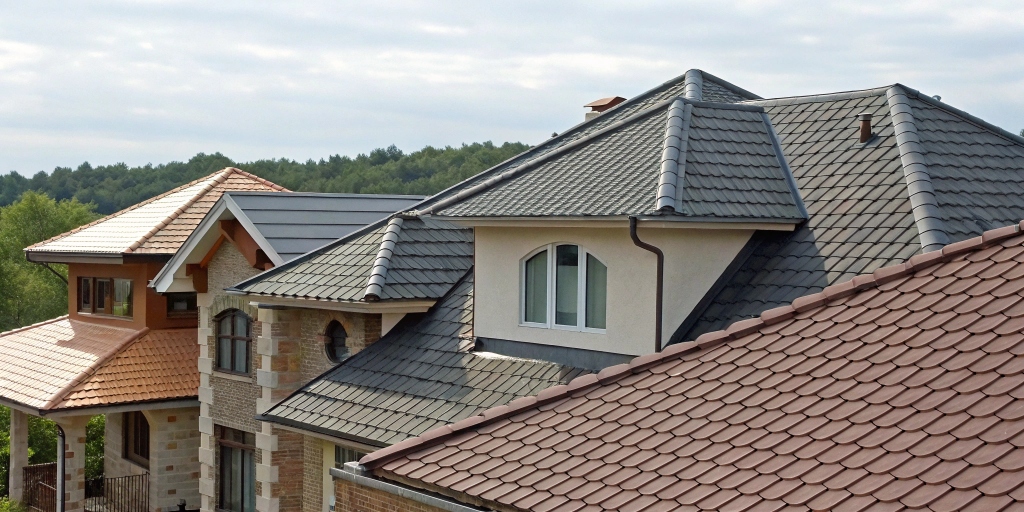
1. The Essence of a Hip Roof In the world of roofing, a hip roof is the epitome of both form and function. It’s not just about shelter; it’s about creating an architectural statement. Imagine a roof that slopes on all sides, meeting at the top to form a peak – that’s the essence of a hip roof.
2. Advantages of Choosing a Hip Roof Why opt for a hip roof? Picture a design that enhances stability, offers better wind resistance, and provides more space for your attic. A hip roof not only looks stylish but also serves as a practical choice for various climates.
Setting the Foundation
3. Assessing Your Structure Before you start swinging a hammer, assess your existing structure. A thorough examination ensures your building can support the added weight and design of a hip roof. This step is crucial for a successful roofing project.
4. Designing Your Roof: The Blueprint Creating a blueprint is like mapping out the journey before embarking on an adventure. Take the time to design your hip roof, considering the pitch, overhangs, and material choices. A well-thought-out blueprint sets the stage for a seamless construction process.
Constructing Your Hip Roof
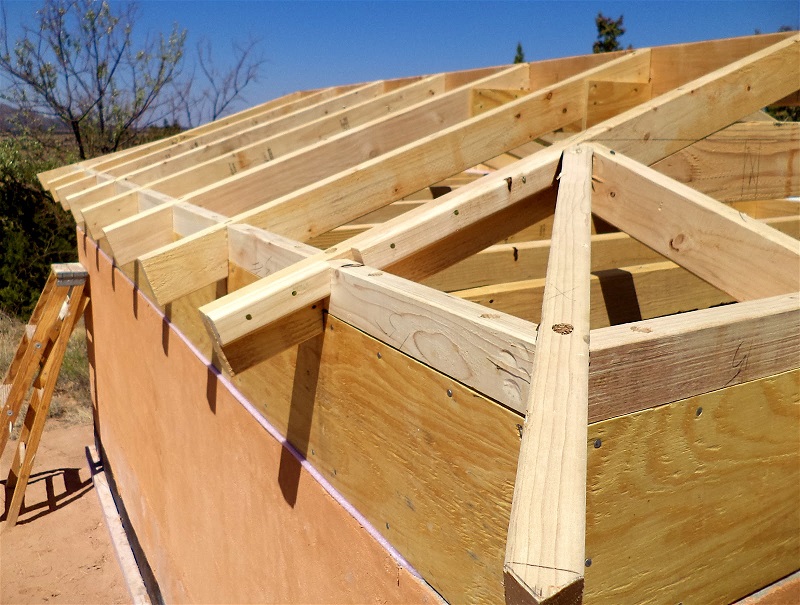
5. Framing the Structure Once your blueprint is in place, it’s time to bring it to life. Framing is the skeleton of your roof, and precision is key. Whether you’re using trusses or rafters, ensure that each piece fits snugly into place, forming the sturdy foundation of your hip roof.
6. Adding the Roof Sheathing Think of the sheathing as the skin of your roof. Choose a durable material and layer it over the framing. This step adds strength and durability, protecting your home from the elements.
Roofing Materials and Finishing Touches
7. Selecting the Right Roofing Material From classic asphalt shingles to modern metal panels, the choice of roofing material impacts both aesthetics and functionality. Consider the climate, budget, and desired appearance when making this crucial decision.
8. Flashing and Ventilation: Don’t Overlook the Details Flashing prevents water infiltration, and proper ventilation ensures a healthy attic space. These details might be small, but they play a significant role in the longevity and performance of your hip roof.

FAQs (Frequently Asked Questions)
Q: Can I build a hip roof on my existing house?
Absolutely! With a proper structural assessment, you can modify your existing roof into a stylish hip design.
Q: What’s the ideal pitch for a hip roof?
The pitch depends on various factors, but a range of 4/12 to 6/12 is commonly recommended for hip roofs.
Q: Do hip roofs cost more than other roof designs?
While initial costs may be slightly higher, the long-term benefits, including energy efficiency and durability, often outweigh the initial investment.
Q: Can I install solar panels on a hip roof?
Yes, the sloping design of a hip roof can be advantageous for solar panel installation, optimizing sunlight exposure.
Q: How long does it take to build a hip roof?
The timeline varies, but on average, a professional roofing team can complete a hip roof project in a week.
Conclusion:
Embarking on a journey to build a hip roof is an exciting venture. With the right knowledge and a bit of creativity, you can turn your shelter into a masterpiece. So, grab your tools, envision your ideal roof, and start crafting – your hip roof awaits!